
There are two methods of fiber optic splicing, fusion splicing and mechanical splicing. If you are just beginning to splice fiber, you might want to look at your long-term goals in this field in order to chose which technique best fits your economic and performance objectives.
Typical the reason for choosing one method over the other is economics.
Fusion Splicing:
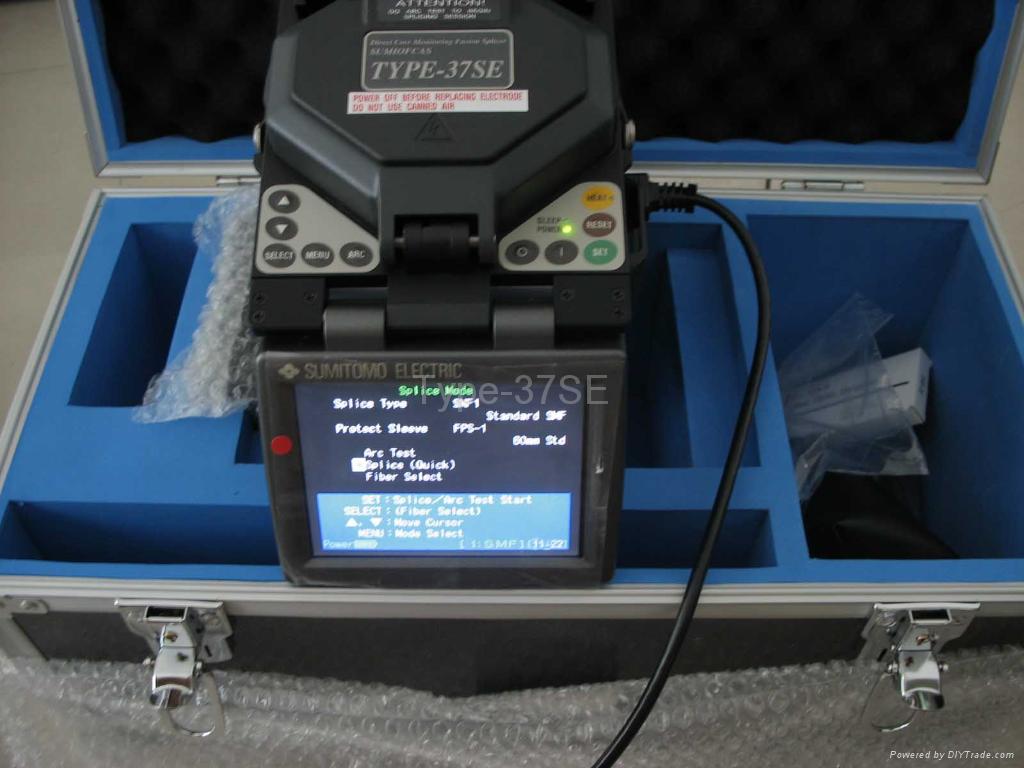
In fiber optic fusion splicing a Fiber Optic Fusion Splicer machine is used to precisely align the two fiber ends then the glass ends are "fused" or "welded" together using some type of heat or electric arc. This produces a continuous connection between the fibers enabling very low loss light transmission. (Typical loss: 0.1 dB). Fusion splicing is lower ($0.50 - $1.50 each), the initial investment is much higher ($15,000 - $50,000 depending on the accuracy and features of the fusion splicer machine being purchased new or you can purchase a refurbished Fiber Optic Fusion Splicer from a reliable test equipment company for $3,000 - $10,000 based on model and features).
Mechanical Splicing:
Mechanical splices are simply alignment devices, designed to hold the two fiber ends in a precisely aligned position thus enabling light to pass from one fiber into the other. (Typical loss: 0.3 dB). Mechanical splicing has a low initial investment ($1,000 - $2,000) but costs more per splice ($12-$40 each).

Performance of each splicing method, the decision is often based on what industry you are working in. Fusion splicing produces lower loss and less back reflection than mechanical splicing because the resulting fusion splice points are almost seamless. Fusion splices are used primarily with single mode fiber where as Mechanical splices work with both single and multimode fiber.
Many Telecommunications and CATV companies invest in fusion splicing for their long haul singlemode networks, but will still use mechanical splicing for shorter, local cable runs. Since analog video signals require minimal reflection for optimal performance, fusion splicing is preferred for this application as well. The LAN industry has the choice of either method, as signal loss and reflection are minor concerns for most LAN applications.
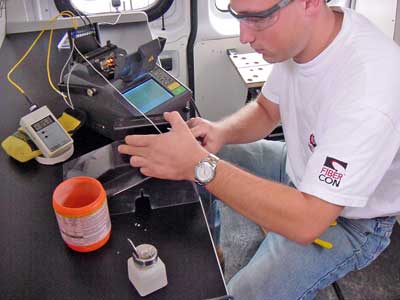
Fusion Splicing Method
As mentioned previously, fusion splicing is a junction of two or more optical fibers that have been permanently affixed by welding them together by an electronic arc.
Four basic steps to completing a proper fusion splice:
Step 1: Preparing the fiber - Strip the protective coatings, jackets, tubes, strength members, etc. leaving only the bare fiber showing. The main concern here is cleanliness.
Step 2: Cleave the fiber - Using a good fiber cleaver here is essential to a successful fusion splice. The cleaved end must be mirror-smooth and perpendicular to the fiber axis to obtain a proper splice. NOTE: The cleaver does not cut the fiber! It merely nicks the fiber and then pulls or flexes it to cause a clean break. The goal is to produce a cleaved end that is as perfectly perpendicular as possible. That is why a good cleaver for fusion splicing can often cost $1,000 to $3,000. These cleavers can consistently produce a cleave angle of 0.5 degree or less.
Step 3: Fuse the fiber - There are two steps within this step, alignment and heating. Alignment can be manual or automatic depending on what equipment you have. The higher priced equipment you use, the more accurate the alignment becomes. Once properly aligned the fusion splicer unit then uses an electrical arc to melt the fibers, permanently welding the two fiber ends together.
Step 4: Protect the fiber - Protecting the fiber from bending and tensile forces will ensure the splice not break during normal handling. A typical fusion splice has a tensile strength between 0.5 and 1.5 lbs and will not break during normal handling but it still requires protection from excessive bending and pulling forces. Using heat shrink tubing, silicone gel and/or mechanical crimp protectors will keep the splice protected from outside elements and breakage.
Mechanical Splicing Method
Mechanical splicing is an optical junction where the fibers are precisely aligned and held in place by a self-contained assembly, not a permanent bond. This method aligns the two fiber ends to a common centerline, aligning their cores so the light can pass from one fiber to another.
Four steps to performing a mechanical splice:
Step 1: Preparing the fiber - Strip the protective coatings, jackets, tubes, strength members, etc. leaving only the bare fiber showing. The main concern here is cleanliness.
Step 2: Cleave the fiber - The process is identical to the cleaving for fusion splicing but the cleave precision is not as critical.
Step 3: Mechanically join the fibers - There is no heat used in this method. Simply position the fiber ends together inside the mechanical splice unit. The index matching gel inside the mechanical splice apparatus will help couple the light from one fiber end to the other. Older apparatus will have an epoxy rather than the index matching gel holding the cores together.
Step 4: Protect the fiber - the completed mechanical splice provides its own protection for the splice.


5 comments:
Thanks for sharing. SECO as Shebani Electra Company is popularly called manufacture and supply technology advanced testing Instruments. Compression Testing machine
Wonderful information Thanks for sharing....
OTDR
Splicing machine
Wonderful blog post..nice information. Thanks for sharing..
USB OTDR
NOYES OTDR
OTDR FIBER TESTER
FIBER OPTIC CABLE
OTDR COST
JDSU OTDR
Very nice artical. Thanks for sharing it Are you looking the best price for best splicing machine and deviser otdr price you want to get great deals & best buy this product.
wifi router
cctv camera
best splicing machine in delhi
Best otdr machine price
Post a Comment